.avif)


Ductless AC Sizing Mistakes That Leave Coastal Homes Clammy in July
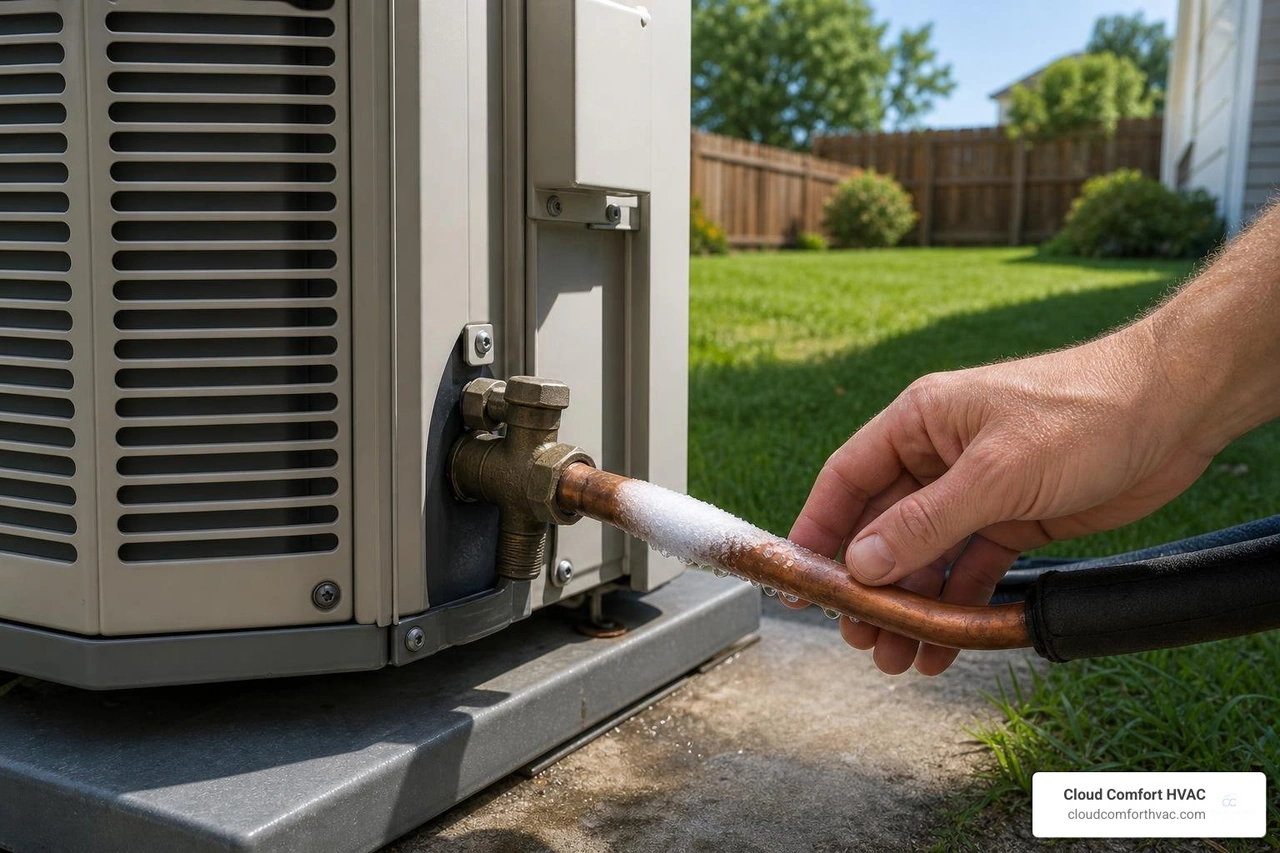
An oversized mini-split might cool your home quickly, but it won't run long enough to remove heavy summer humidity. Find out why precise cooling load calculations matter more than raw tonnage.